Getting started
with Resell RX
A step-by-step walkthrough for setting up your account, adding your inventory and using the tools you’ll reach for every day.
Set up your account
A few minutes of setup now makes every count, receipt and report easier later.
Meet your Quick Actions
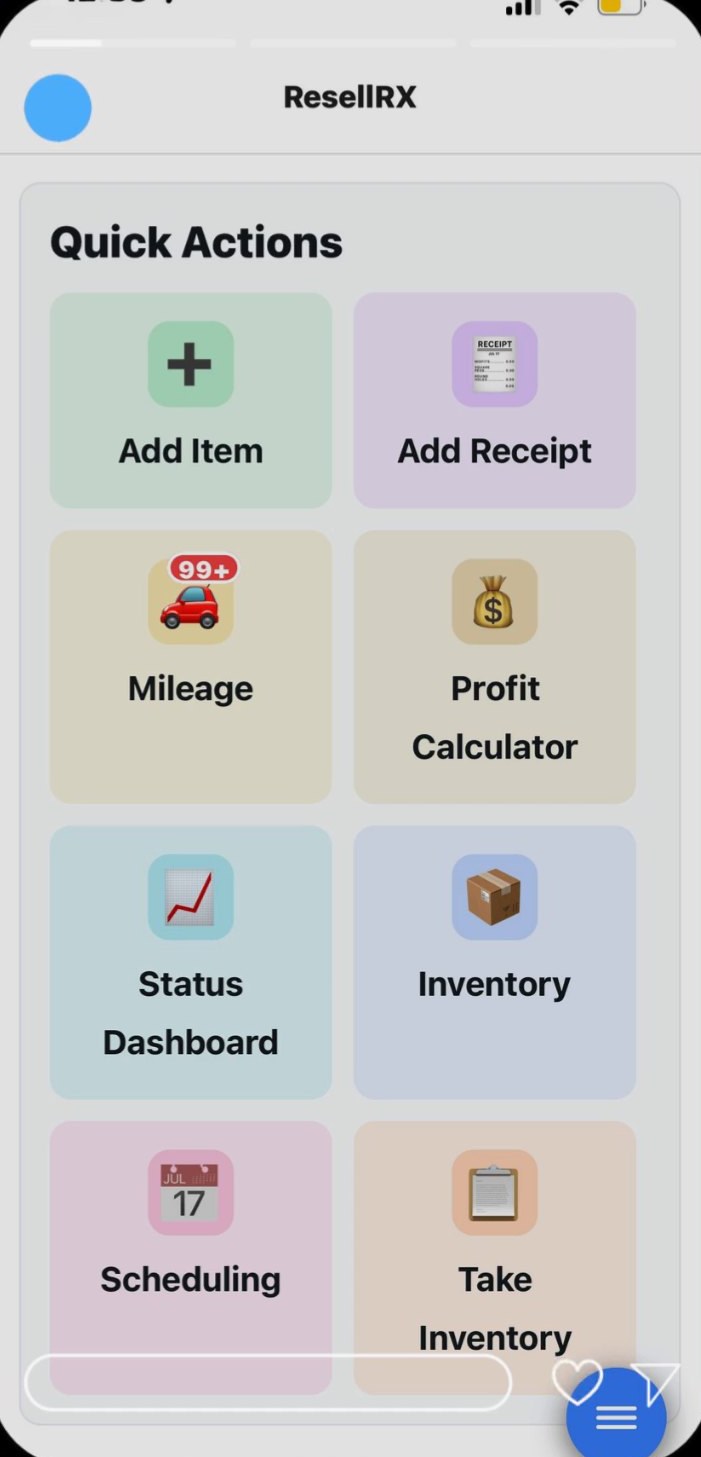
Your home screen puts the tools you’ll use most one tap away: Add Item, Add Receipt, Mileage, Profit Calculator, Status Dashboard, Inventory, Scheduling and Take Inventory.
- 1Tap any tile to jump straight into that tool.
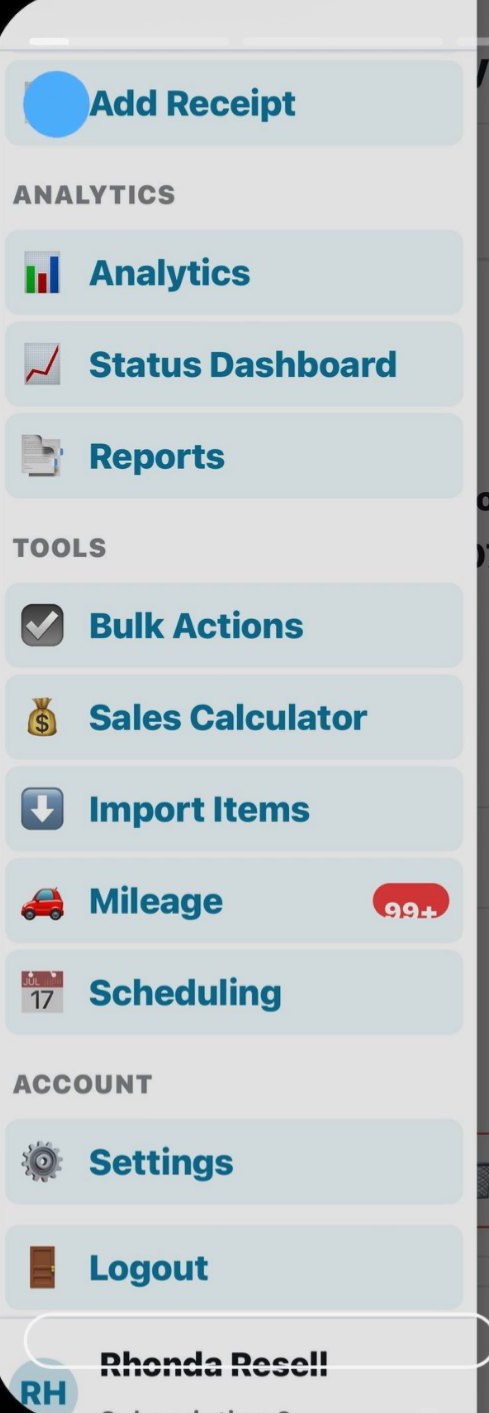
- 2Tap the blue menu button in the corner to open the side menu for Analytics, Reports, Tools and Settings.
Bring in your eBay store or spreadsheet
The quickest way to get started is to import the inventory you already have, instead of entering it item by item.
- 1Open the side menu.
- 2Under Tools, tap Import Items.
- 3Choose your eBay store or a spreadsheet file and select the items to bring in.
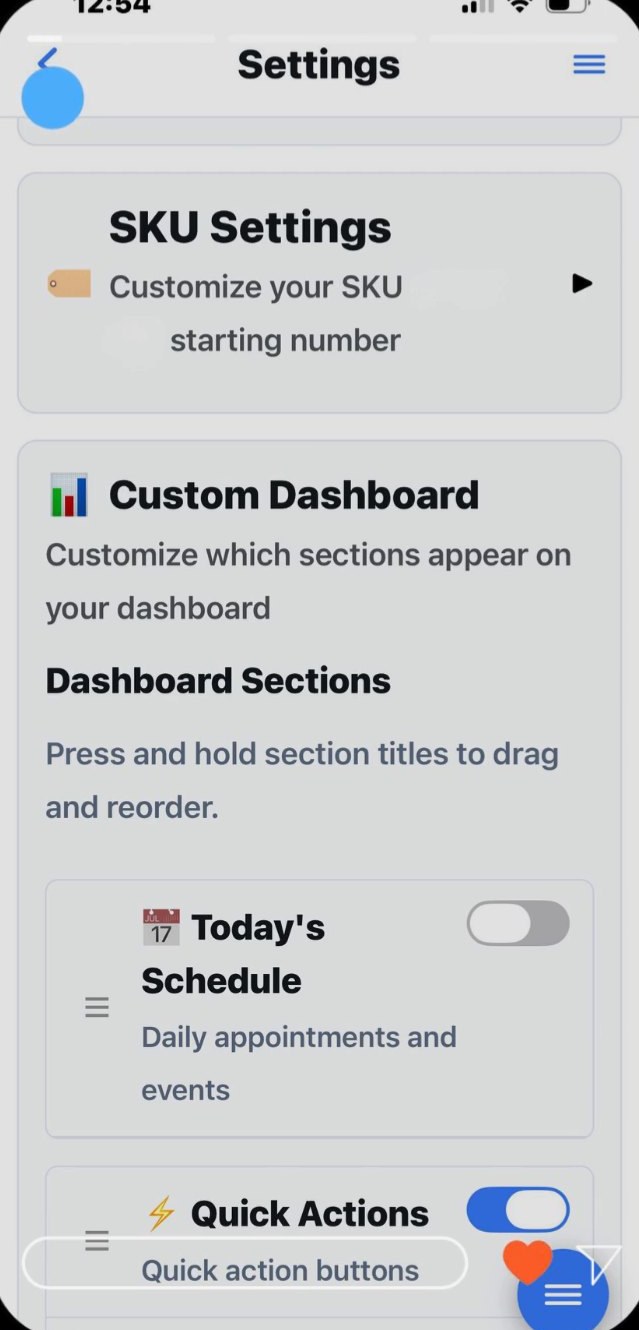
Make the dashboard yours
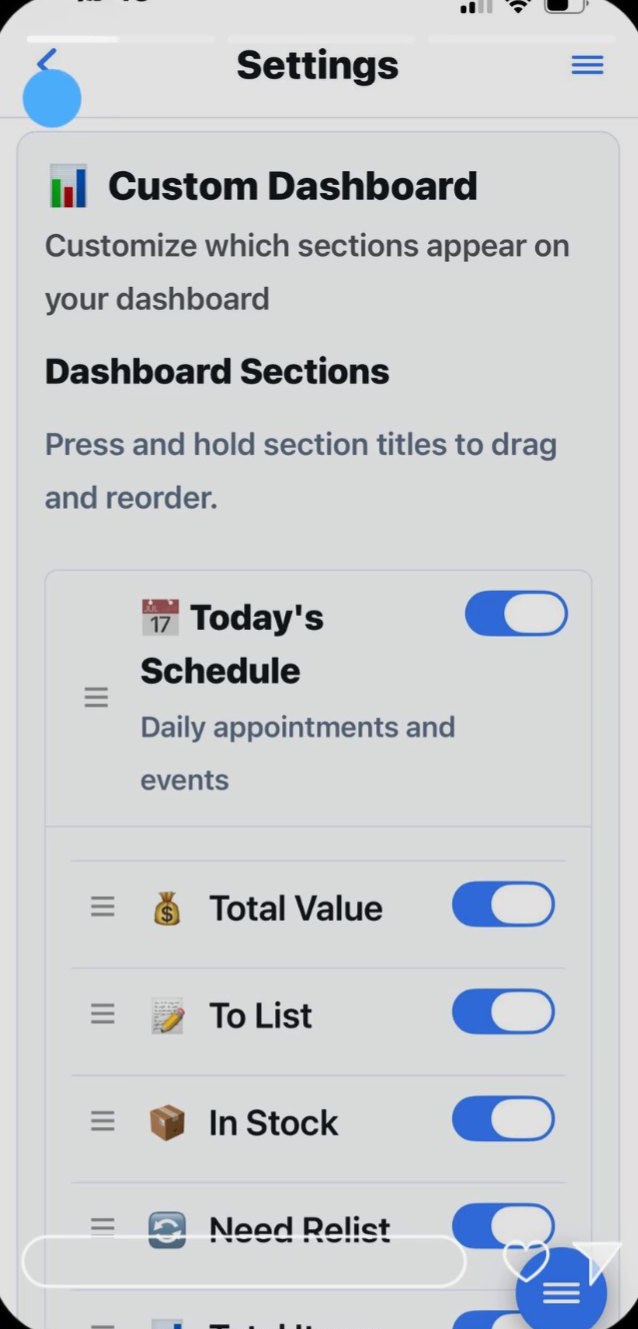
Show only the numbers you care about, in the order you want to see them.
- 1Open the side menu and tap Settings.
- 2Find Custom Dashboard.
- 3Switch sections like Today’s Schedule, Total Value, To List and In Stock on or off.
- 4Press and hold a section title, then drag it to reorder.
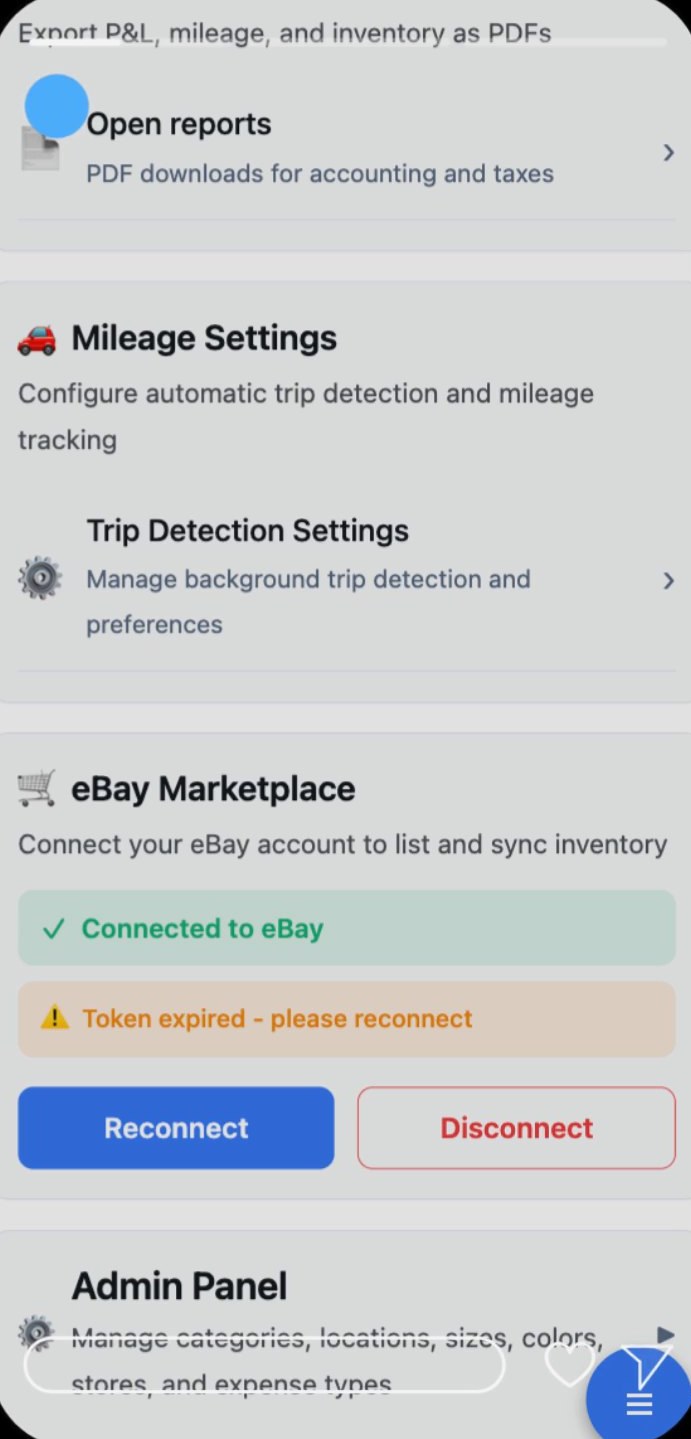
Set up categories, locations and more
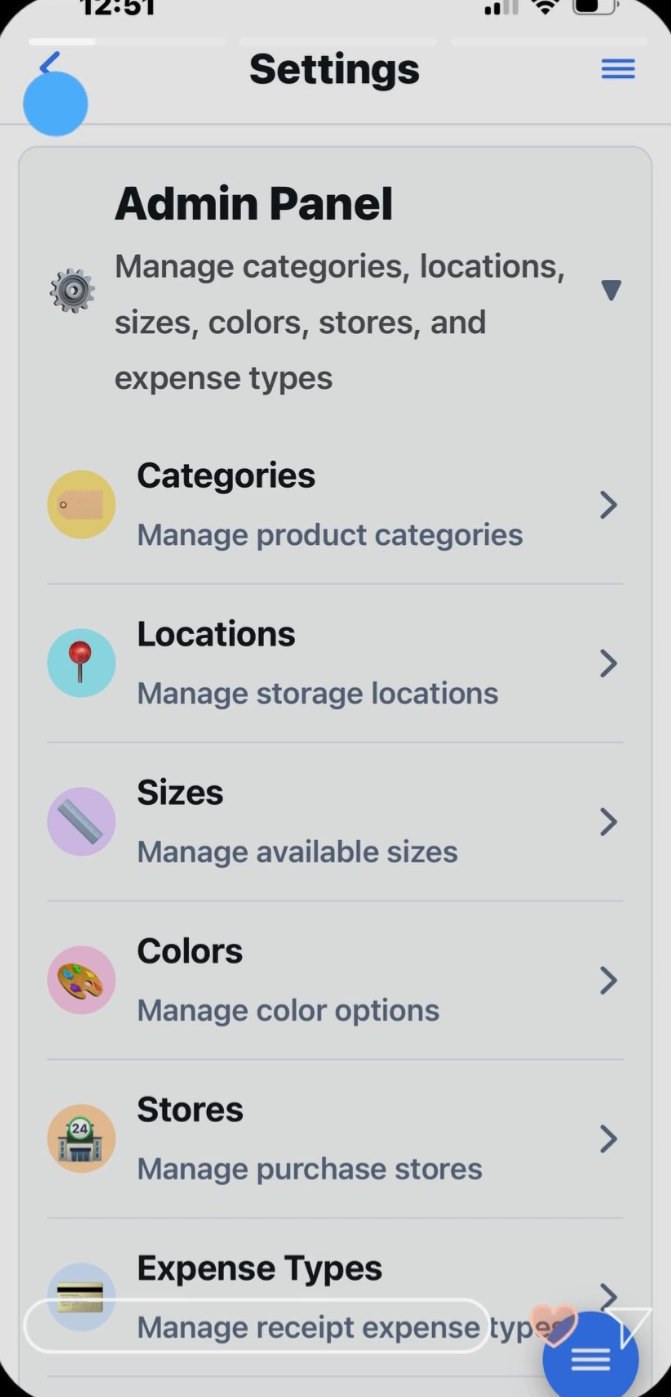
The Admin Panel holds the lists you pick from when you add items and receipts. Set it up once to match the way your business runs.
- 1Go to Settings › Admin Panel.
- 2Add or edit your Categories, Locations, Sizes, Colors, Stores and Expense Types.
Choose your own SKU numbers
Keep Resell RX in step with the SKU system you already use.
- 1Go to Settings › SKU Settings.
- 2Enter the starting number you want your SKUs to begin with.
Turn on automatic mileage tracking
Set it up once and Resell RX tracks your sourcing trips in the background, ready for tax time.
- 1Go to Settings › Mileage Settings.
- 2Open Trip Detection Settings.
- 3Choose your background trip detection preferences.
Add your inventory
Build your inventory by hand, by import, or both. Cost and location are what keep your numbers honest.
Add items by hand or import them after listing
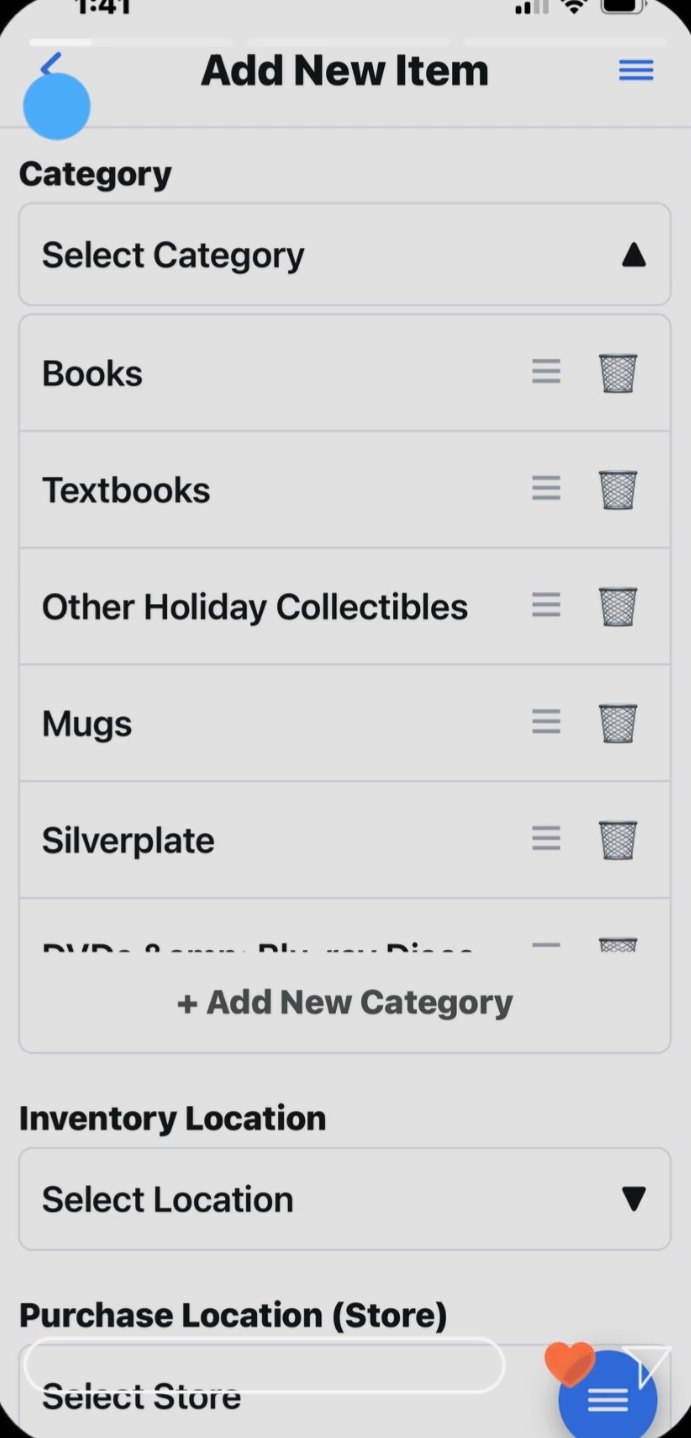
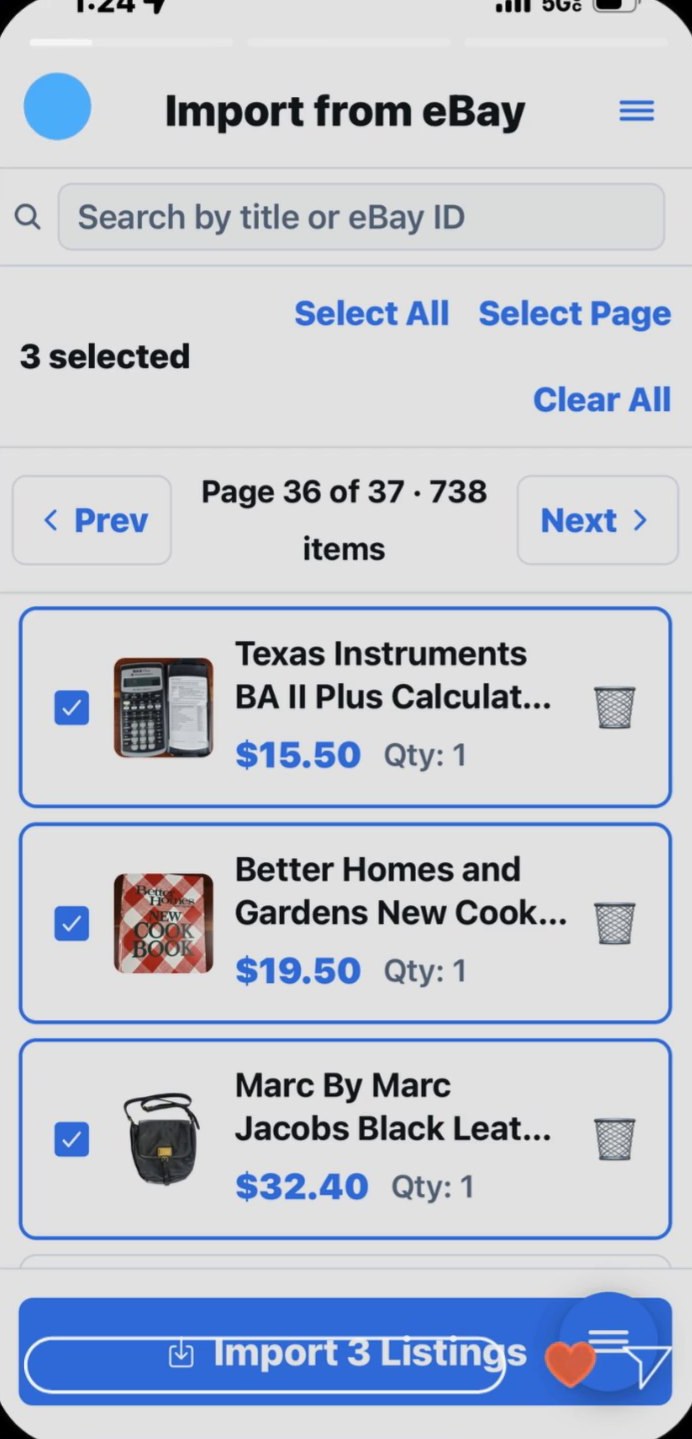
Add a new find right in the app, or list it first and import it from eBay afterward. Either way, finish by adding its cost and location so your counts and profits stay accurate.
- 1To add by hand, tap Add Item and choose a category, inventory location and purchase store.
- 2To import, open Import from eBay, select your listings and tap Import.
- 3Add the cost and location to each imported item.
Everyday tools
The screens you’ll come back to every week to count, track spending and stay on schedule.
Count your inventory in minutes
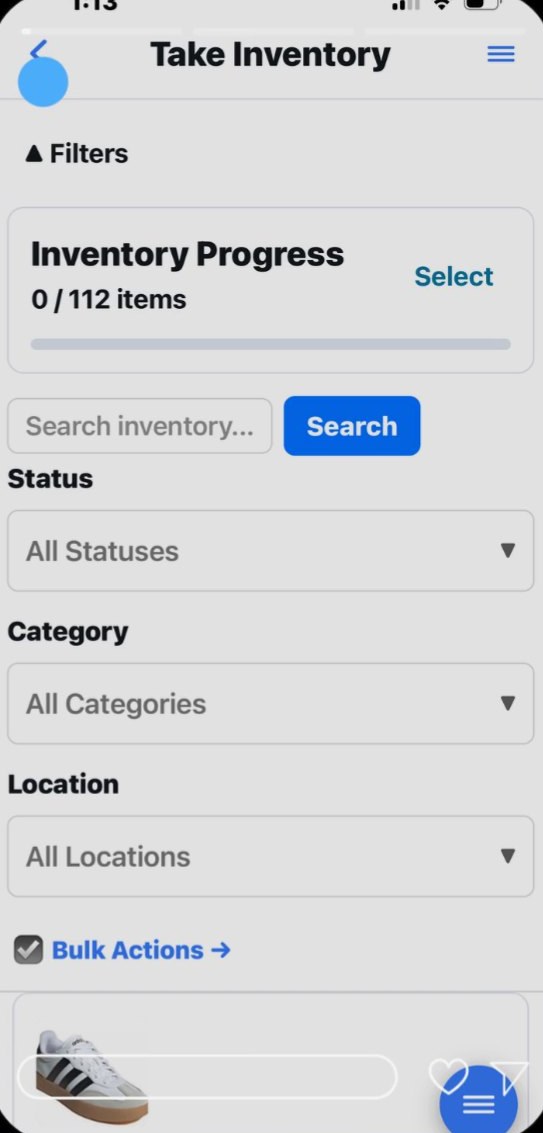
No clipboard, no spreadsheet. Work through one location at a time and flag anything that has changed.
- 1Open Take Inventory.
- 2Filter by location, status or category.
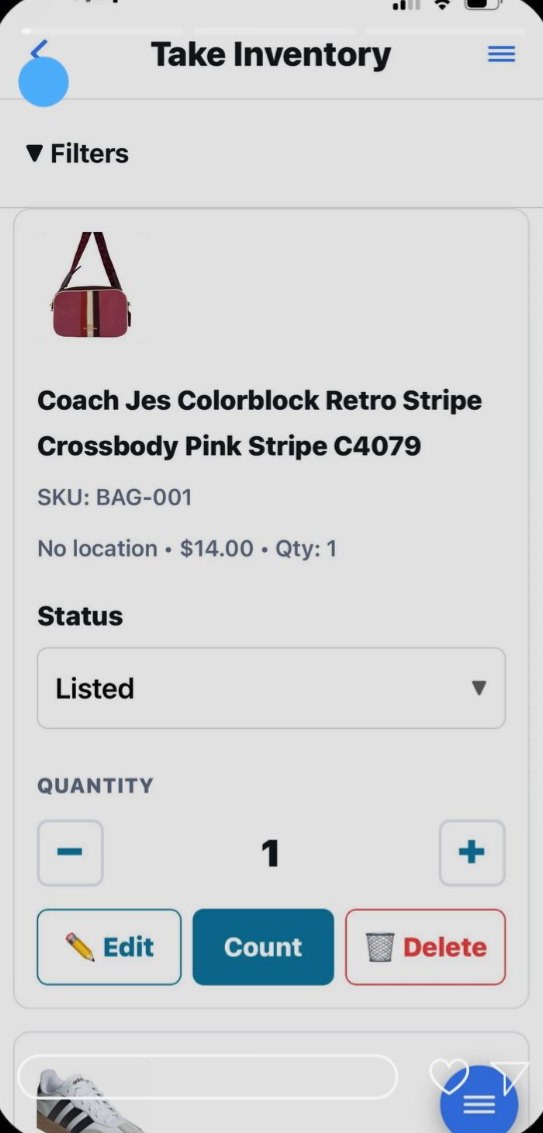
- 3If something has changed, tap Edit or adjust the quantity.
- 4Tap Count and move on to the next item.
Split one receipt between expenses and inventory
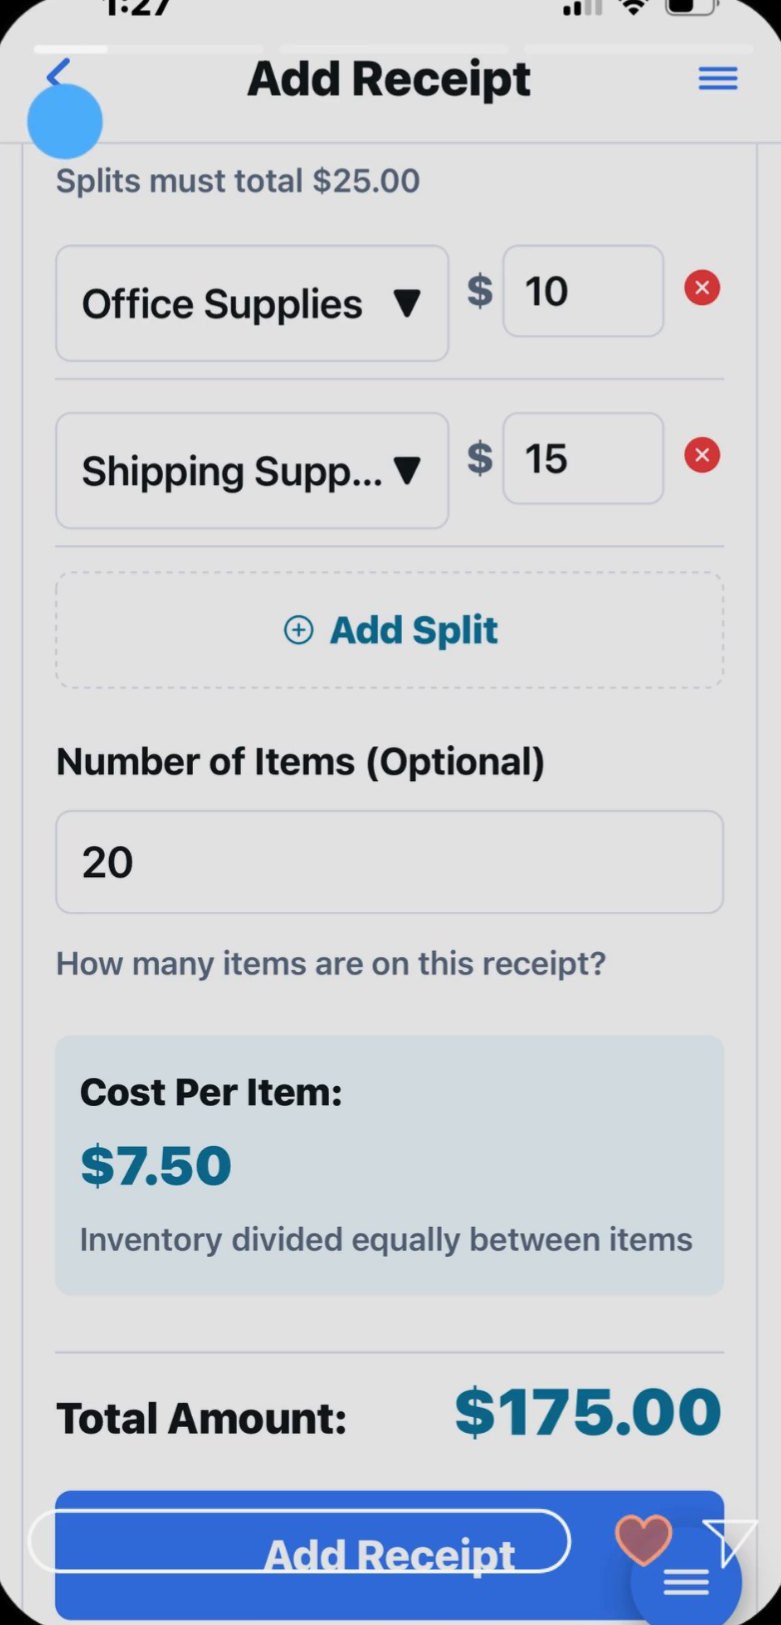
Bought shipping supplies and inventory on the same trip? Split a single receipt so business expenses stay separate from cost of goods.
- 1Tap Add Receipt.
- 2Tap Add Split to divide part of the total into expense types, like office or shipping supplies.
- 3Enter the number of items on the receipt to split the inventory cost evenly. Resell RX shows the cost per item.
Plan your week and never miss an expiration
Block out time for sourcing, listing and restocking, and let reminders keep track of what’s coming up.
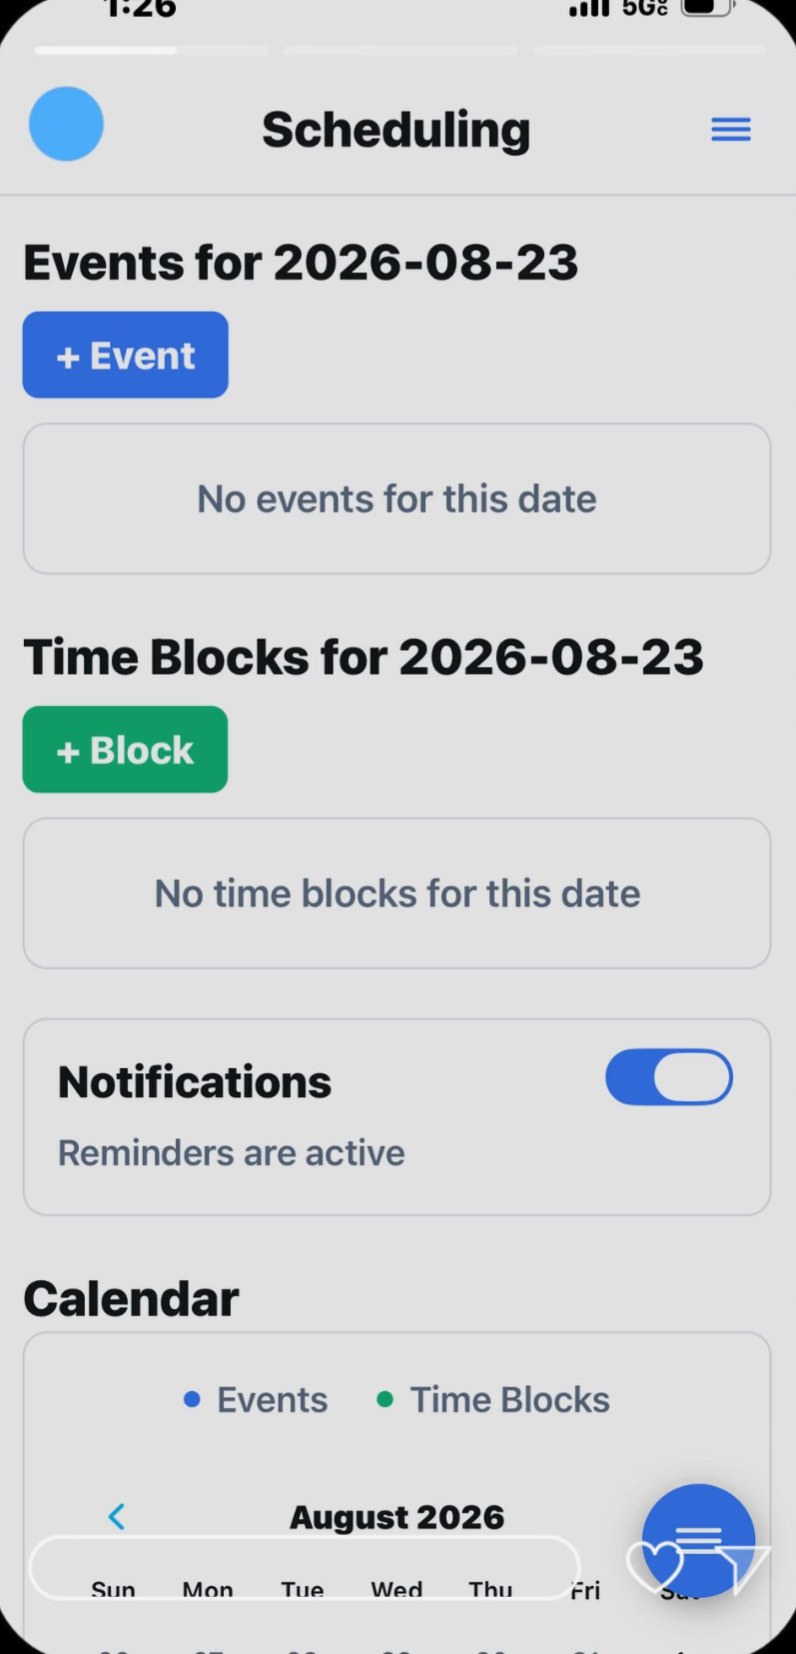
- 1Open Scheduling.
- 2Tap + Event or + Block to add appointments and time blocks for work.
- 3Turn on Notifications to get a reminder when a product is about to expire or an event is coming up.
Stuck on a step?
Email us and we’ll help you get your account set up the way your business works.